NETLAB+ requires all Catalyst 1912 and 1924 switches to be running Enterprise Edition
9.00.04 or later (these versions support command-line interface and Virtual LAN).
If it is not, NETLAB+ will not function correctly - you must upgrade the switch.
You can use your NETLAB+ server to accomplish this upgrade if needed.
Please perform the following tasks to upgrade your switch(es).
-
You should disable logins from the NETLAB+ admin interface. Therefore no one
can access the lab while you are performing the upgrade. Login to NETLAB+ with your
administrator account and then select "Enable/Disable User Logins". To disable logins:
provide a message that will be displayed to users when they access NETLAB+,
then click Disable Logins.
-
Return to the administration main page, and now select "Manage System Images in TFTP Directory".
NETLAB+ maintains a TFTP directory from which NETLAB+ automated operations can load
system images and configuration files. You can upload system images with a .bin
extension from your local machine to NETLAB+'s TFTP Directory. In order to upload a
system image to NETLAB+, the image must exist on your local PC. Upload the image file for
Enterprise Edition 9.00.0x, usually cat1900EN.9.00.0x.bin (where x denotes version 4 or later).
-
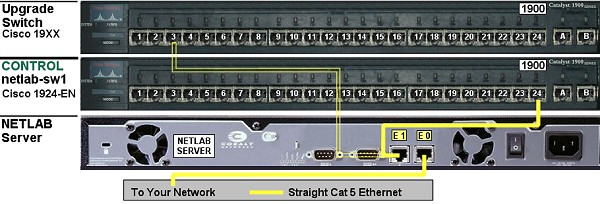
You will use NETLAB+'s Ethernet Interface 1 (eth1 or E1) to accomplish this upgrade. Temporarily
disconnect NETLAB+'s straight-thru cable from the control switch on port 24 and
connect it to an available port on the switch to be upgraded (i.e. port 3). If the switch
you are upgrading is control switch netlab-sw1, you do not need to disconnect the straight-thru cable.
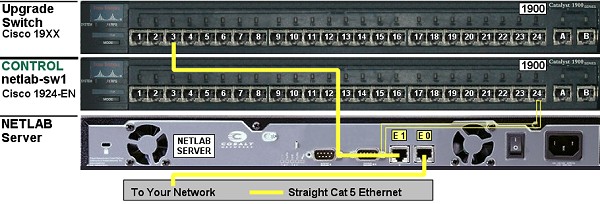
Your NETLAB+ server may look different from the one
displayed here. Please refer to the printed label on your NETLAB+ server to
help locate the E0 (eth0) port and the E1 (eth1) port.
-
Connect a terminal or PC emulator to the switch console port and
power on the device so that you can perform the following configuration tasks.
- Make sure your switch is not already running Enterprise Edition
9.00.04 or later. If it is, you do not need to perform this upgrade.
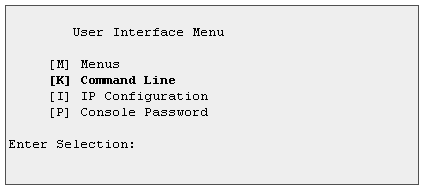
If you do not see a "[K] Command Line" menu option
on the User Interface Menu, the switch is running Standard
Edition software - you must upgrade to Enterprise Edition
9.00.04 or later.
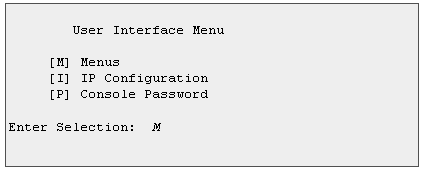
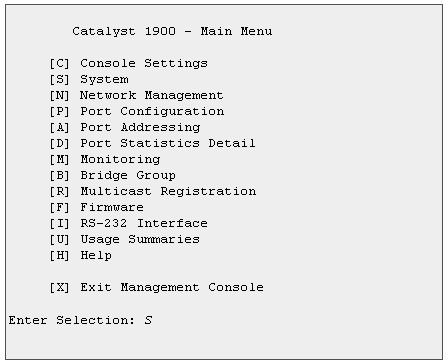
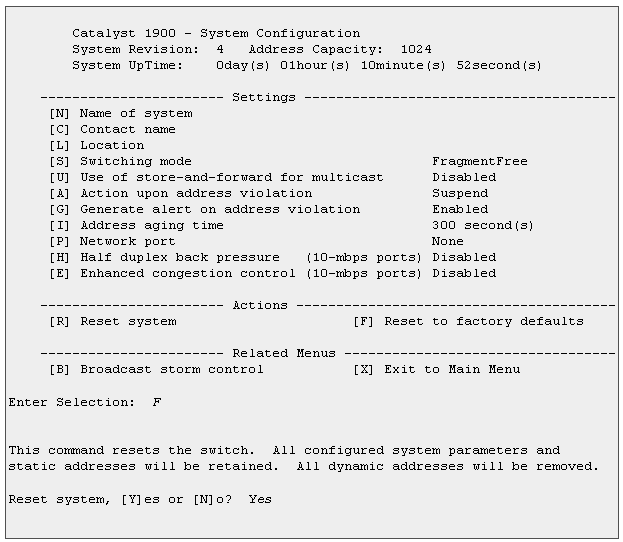
- Clear the existing configuration from the switch.
You may be prompted for an enable password when entering
the main menu. If this switch was used in a previous
NETLAB+ installation, the enable password will be cisco.
If you do not know the enable password, you will have to
perform a password recovery (please see the Cisco
documentation).
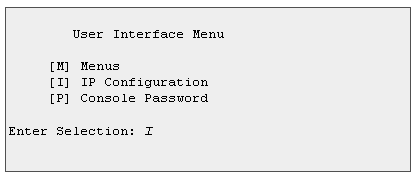
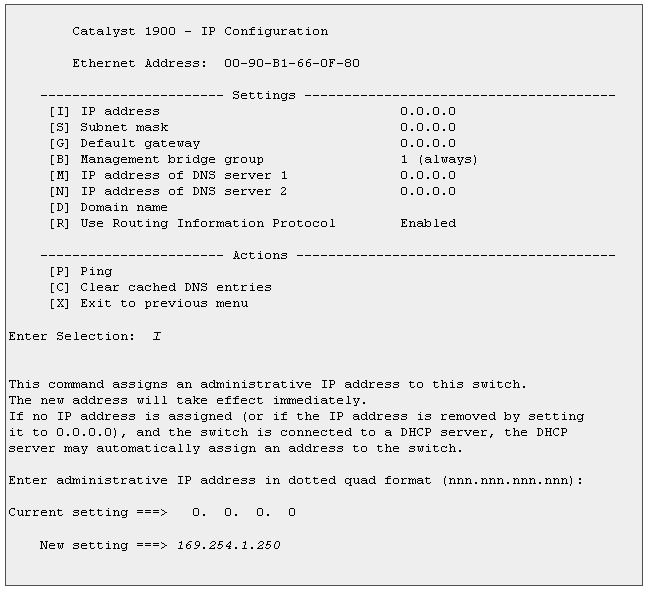
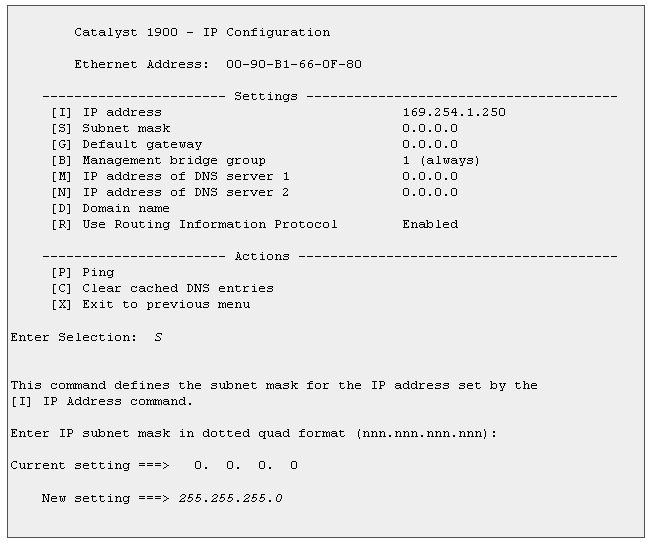
- Assign IP address 169.254.1.250 and mask 255.255.255.0 to the
switch. This IP address has been designated for the sole purpose of this upgrade.
Duplicate IP addresses will lead to trouble!
Only assign address 169.254.1.250 to the switch. This IP address has been
designated for the sole purpose of this upgrade.
-
Wait 60 seconds for spanning tree algorithm to
compute on the trunk ports.
-
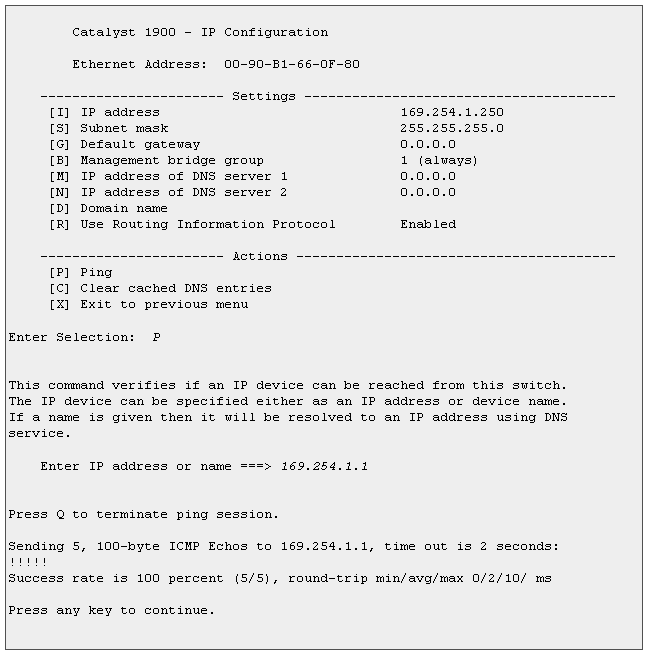
Ping the NETLAB+ server using IP address 169.254.1.1 to
verify connectivity. If you are unable to ping the NETLAB+ server,
recheck the cables.
-
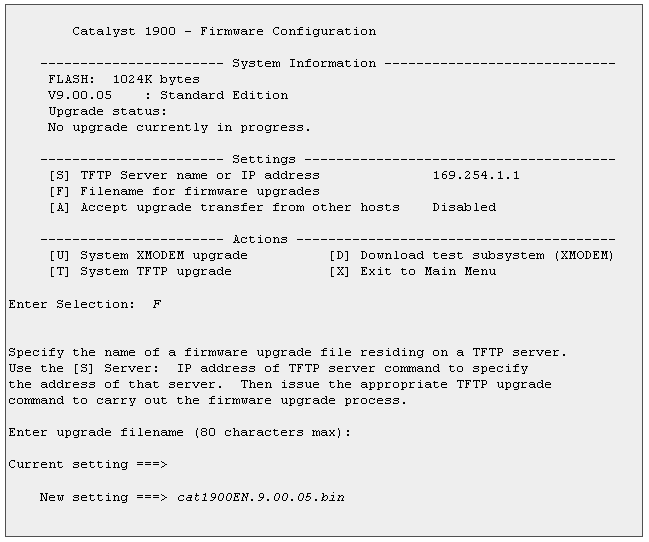
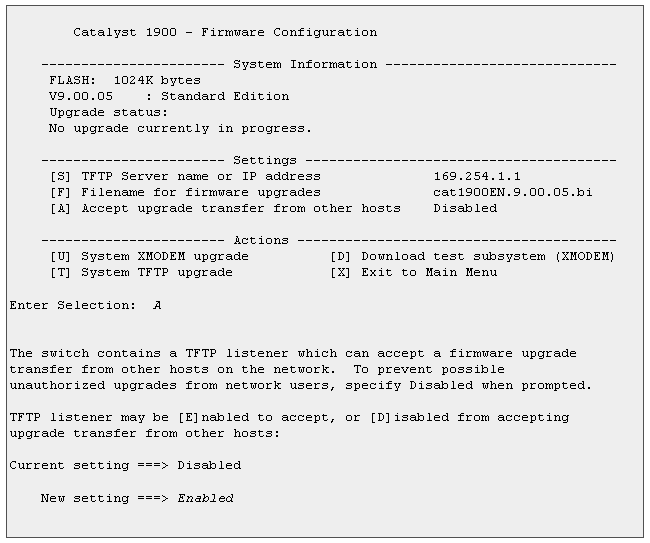
Now you are ready to upgrade the software image on the switch. Set the
TFTP Server name or IP address to 169.254.1.1 and set the
Filename for firmware upgrades to cat1900EN.9.00.0x.bin.
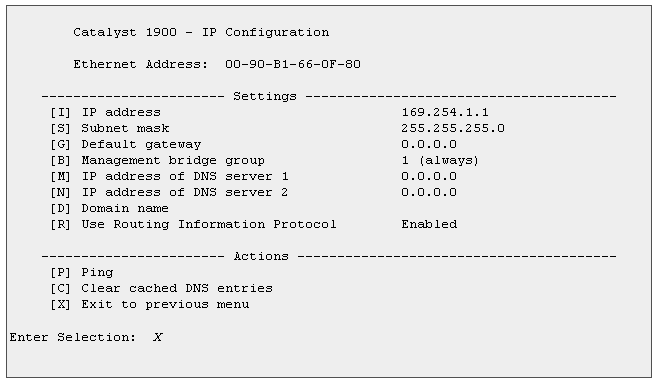
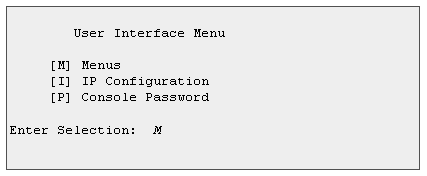
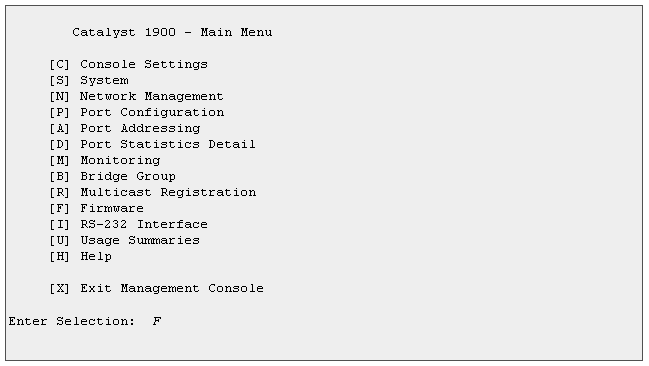
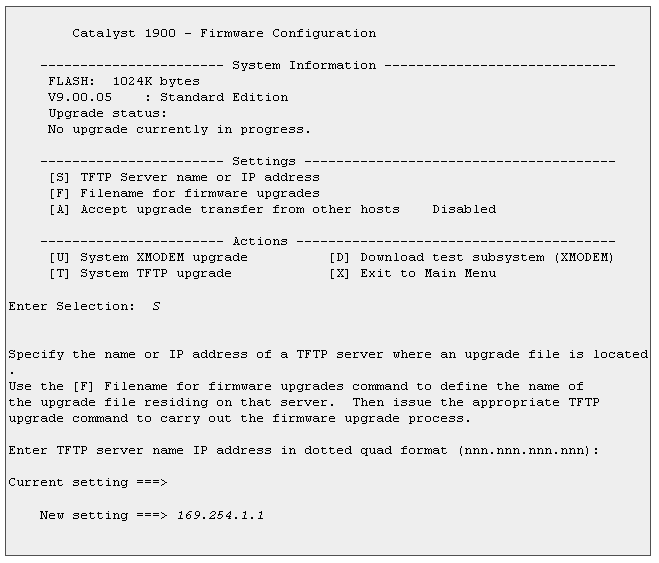
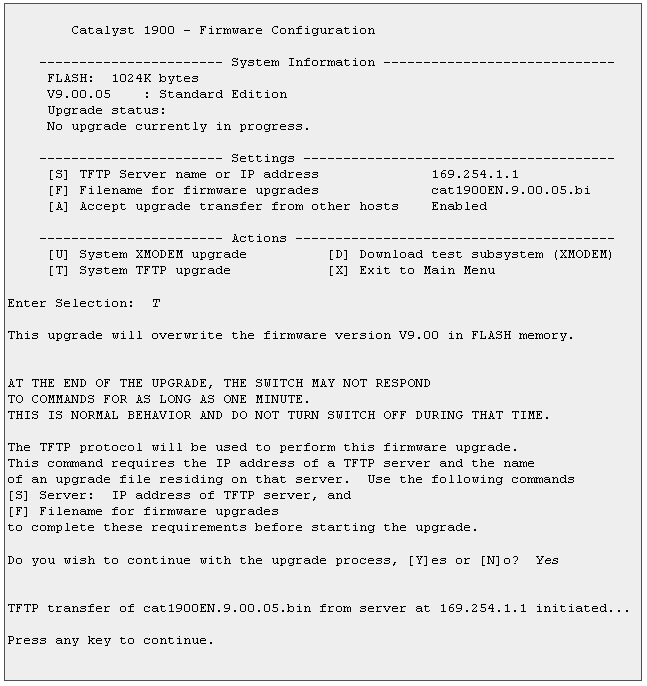
- Wait a minute for the switch to upgrade
.
If you see a "[K] Command Line" menu option
on the User Interface Menu, the switch is running Enterprise Edition software.
-
Reconnect the straight-thru cable from the upgraded switch back to the
control switch on port 24. If the switch you upgraded was control switch
netlab-sw1, you do not need to do this.
-
After completing the software upgrade, be sure that the
switch has the correct IP address and configuration file loaded
(if the device is a control switch). Go to the "Configure Control
Devices" link on the NETLAB+ administration web page to obtain the
proper IP address.
-
Finally, you should re-enable user login access to NETLAB+ from the administration web page. Login
to NETLAB+ with your administrator account and select "Enable/Disable User Logins", and then
click Enable Logins.
Return to support >


